
Recently my senior (and dear friend) left Singapore for exchange in London, and left me his printer as part of his legacy. I didn’t really want to keep it in my room, and since it’s a wired printer, I had to find a way to make it wireless. Fortunately, NUS Hackers had a Raspberry Pi lying around which no one was using, so I sought to make full use of it and acquaint myself with the Pi at the same time.
Components
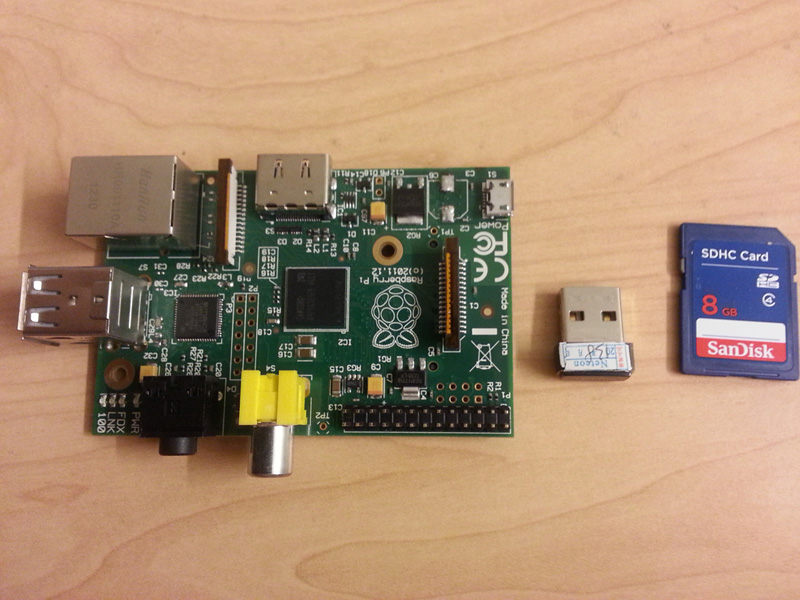
The first step, of course, is to find an SD card which acts as the hard drive for the Pi. You can buy one preloaded with NOOBS, the operating system, on their website, or you can download NOOBS onto any existing SD card which you might own. In my case, I bought one from the local Co-op and loaded NOOBS myself. At the same time, I grabbed a Wi-fi dongle from my deceased desktop, which I’ll be needing later.
1. Enable SSH
After booting up the Pi, the first thing that you’ll want to do is to enable ssh. This way, you can control the Pi just by having it plugged into the local network, instead of having to connect it to a screen and keyboard every time.
You can do this by entering sudo raspi-config in the terminal, then navigate to ‘Advanced Options’, and enable ssh server under ‘SSH’.
2. Set up wireless dongle
Unfortunately, my wireless dongle, a TP-Link TL WN725N V2, did not work out of the box. However, a simple Google search led me to a site where all the drivers are available. If your wireless dongle is a different model, just search for its drivers online. Before downloading the driver, make sure that it’s for the right version of the Pi that you have. If you’re unsure, do a uname -a to find your Pi’s current version. After that, follow the commands below to install the driver. Note that you’ll have to connect your Pi using the LAN port to download the driver.
wget https://dl.dropboxusercontent.com/u/80256631/8188eu-201xyyzz.tar.gz //make sure it's the right version!
tar -zxvf 8188eu-201xyyzz.tar.gz
sudo install -p -m 644 8188eu.ko /lib/modules/$(uname -r)/kernel/drivers/net/wireless
sudo insmod /lib/modules/$(uname -r)/kernel/drivers/net/wireless/8188eu.ko
sudo depmod -a
sudo reboot
3. Configure wireless network
After this is done, it is time to configure your network. You’ll have to edit your network interface as well as wpa_supplicant file, which contains the details for your network. Since you don’t want the IP address to change every time the Pi reboots, you have to give it a static IP address. First, do sudo nano /etc/network/interfaces, and change the line iface wlan0 inet dhcp to
iface wlan0 inet static
address yourAddress
netmask yourNetmask
gateway yourGateway
If you’re unsure of these values, do a ifconfig to find the current IP address and netmask, and route -nee to find the current default gateway.
After you’re done, edit your network details by doing sudo nano etc/wpa_supplicant/wpa_suppicant.conf. By default, these two lines should be at the top:
ctrl_interface=DIR=/var/run/wpa_supplicant GROUP=netdev
update_config=1
After these two lines, edit the file to look like the following:
network={
    ssid="yourNetworkSSID"
    psk="yourNetworkPassword"
}
The above is the simplest example for a WPA authenticated network, but since the NUS network uses a different kind of authentication, it’s a little more complicated than that.
network={
    ssid="NUS"
    proto=RSN
    key_mgmt=WPA-EAP
    pairwise=CCMP
    auth_alg=OPEN
    eap=PEAP
    identity="yourUsername"
    password="yourPassword"
}
This will get you connected to the NUS network. If your Wi-Fi connection drops though, you’re gonna have trouble reconnecting to your Pi again. So, to prevent that, we set up a script which checks the connection every minute, and reconnects to the network if it’s down. Put the following script in /usr/local/bin/network-monitor.sh:
#!/bin/bash

TESTIP=8.8.8.8

ping -c4 ${TESTIP} > /dev/null

if [ $? != 0 ]
then
    logger -t $0 "WiFi has gone down- run ifup"
    /sbin/ifdown --force wlan0
    /sbin/ifup wlan0
else
        logger -t $0 "WiFi is currently up"
fi
Finally, do sudo crontab -e and add this to the end of the file: * * * * * /usr/local/bin/network-monitor.sh. Cron is a service which starts up automatically whenever the Pi boots, so this will tell Cron to run the script every minute.
4. Set up CUPS and your printer
Now that you’re done setting up your Pi, we can finally get to installing the printer. Do sudo apt-get install cups to install CUPS, an open source printing system developed by Apple for UNIX-based operating systems. Next, do sudo usermod -a -G lpadmin username to add yourself to the admin files. After this is done, you can access CUPS on any connected computer using your Pi’s IP address, as such: yourAddress:631.
- Connect your printer to your Pi, and navigate to https://yourAddress:631/admin.
- Under Administration, click Add Printer. If prompted, login using your Pi’s username and password.
- Select your printer from the Local Printer list, it is probably the one with an usb in its name.
- Next, enter the description, location and tick Share This Printer.
- On the next page, choose your printer’s model from the existing list, or if it is not available, provide a PPD file corresponding to the model of your printer. These can be found easily through a simple Google search.
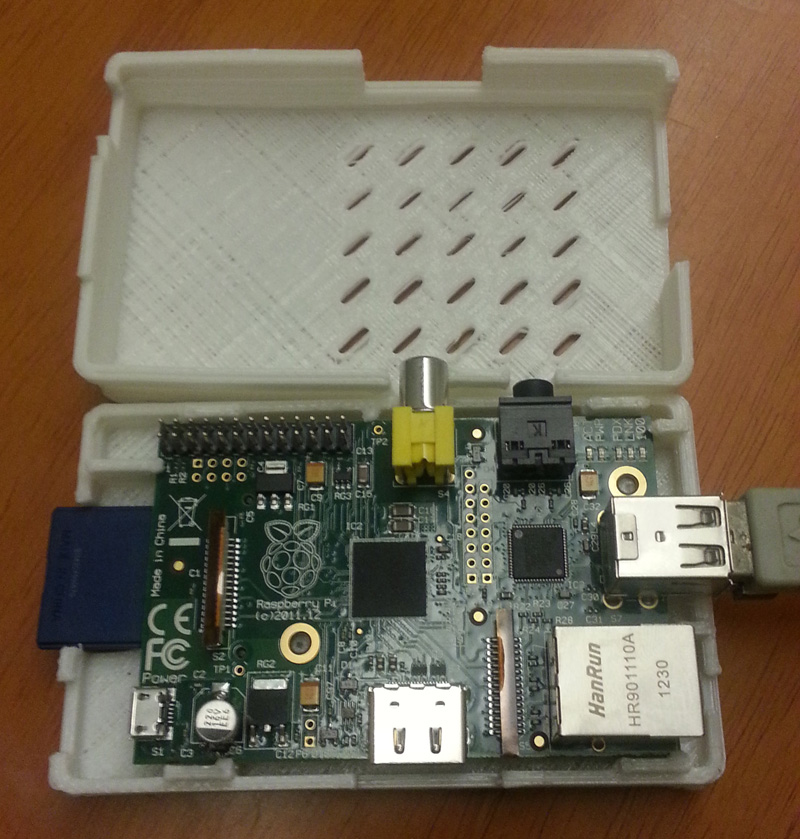
And you’re done! All you have to do now is to mount your Pi somewhere it can receive wireless signals. I 3D-printed a case from Thingiverse and mounted it on the wall beside my printer.
Now you can add your network printer to any computer that is connected within the same network. In my case, I can print from any corner of NUS!
