
Ever since my wife and I received a free Google Home Mini from Spotify not long ago, we have been on this downward spiral of laziness and not wanting to physically move at all to do anything in the house. Alas we had a dumb TV, which meant that we had to experience the excruciating process of finding the TV remote, lifting it, and pressing the big red button on it every day. To avoid this daily torture, I decided to convert my dumb TV to a smart TV by connecting it to Google Home.
The idea is to program a microcontroller that’s connected to your Wi-Fi network and will respond to commands sent to Google Home, translating that to the equivalent infra-red signals to the TV. Essentially, this will be a Wi-Fi connected remote control.
Materials
If you have a dumb TV like me, you’ll need
- ESP8266 with Wi-Fi connection. I used a Node-MCU.
- Infra-red receiver and transmitter. If you already know the IR codes for your TV, you just need the IR transmistter.
- Driver for IR bulb. I used an NPN transistor, 2N3904.
- Optional Arduino. you can use the ESP8266 to build the receiver circuit instead.
Finding the right IR codes for your TV
Whenever you press a button on your remote, it sends a code to your TV using the IR bulb at the top of the remote. We will need to reverse engineer these codes if we want to achieve the same thing with our microcontroller. If you already know the IR codes, you can skip these steps.
I followed the guide at CircuitBasics to connect the IR receiver to an Arduino.
 Credits to CircuitBasics
The steps will basically be the same with an ESP8266, though you might have to use the IRremoteESP8266 library instead.
The sketch below will print both the code as well as the standard used by your TV manufacturer. The sketch is based on this tutorial.
#include <IRremote.h>

int IRpin = 10;
IRrecv irrecv(IRpin);
decode_results results;

void setup()
{
  Serial.begin(9600);
  irrecv.enableIRIn(); // Start the receiver
}

void loop()
{
  if (irrecv.decode(&results))
    {
      Serial.println(results.value, DEC); // Print the Serial 'results.value'
      switch (results.decode_type){
        case NEC: Serial.println("NEC"); break ;
        case SONY: Serial.println("SONY"); break ;
        case RC5: Serial.println("RC5"); break ;
        case RC6: Serial.println("RC6"); break ;
        case DISH: Serial.println("DISH"); break ;
        case SHARP: Serial.println("SHARP"); break ;
        case JVC: Serial.println("JVC"); break ;
        case SAMSUNG: Serial.println("SAMSUNG"); break ;
        case LG: Serial.println("LG"); break ;
        case WHYNTER: Serial.println("WHYNTER"); break ;
        case PANASONIC: Serial.println("PANASONIC"); break ;
        case DENON: Serial.println("DENON"); break ;
      default:
        case UNKNOWN: Serial.println("UNKNOWN"); break ;
      }
      irrecv.resume();   // Receive the next value
    }
}
Credits to TechZeero
Once the Arduino is up and running, press the desired buttons you want to replicate on your TV remote. The Arduino should print the code to the serial output. Record that down so we can reproduce it in the future.
Setting up the transmitter
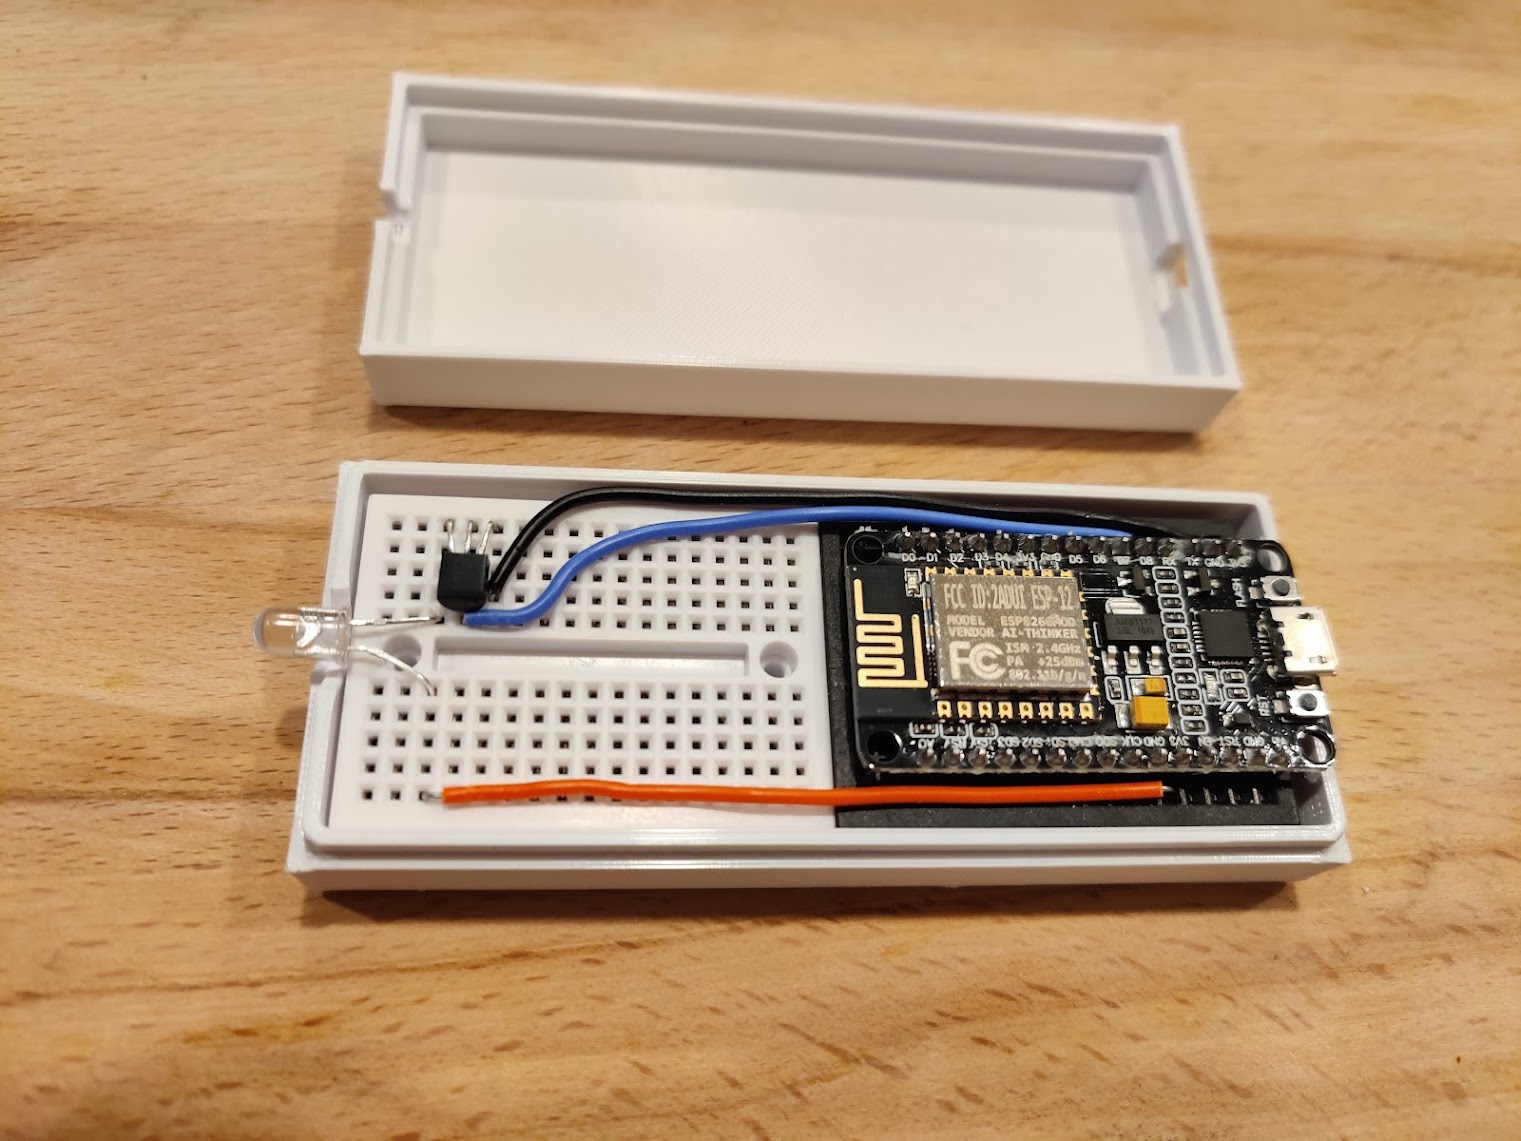
Next up, we will set up the transmitter circuit of the ESP8266 as below. Note that the npn transmitter is required to drive enough current to the IR transmitter. Without it, the current may be too weak for the IR transmitter to work properly.
Connecting to Sinric Pro
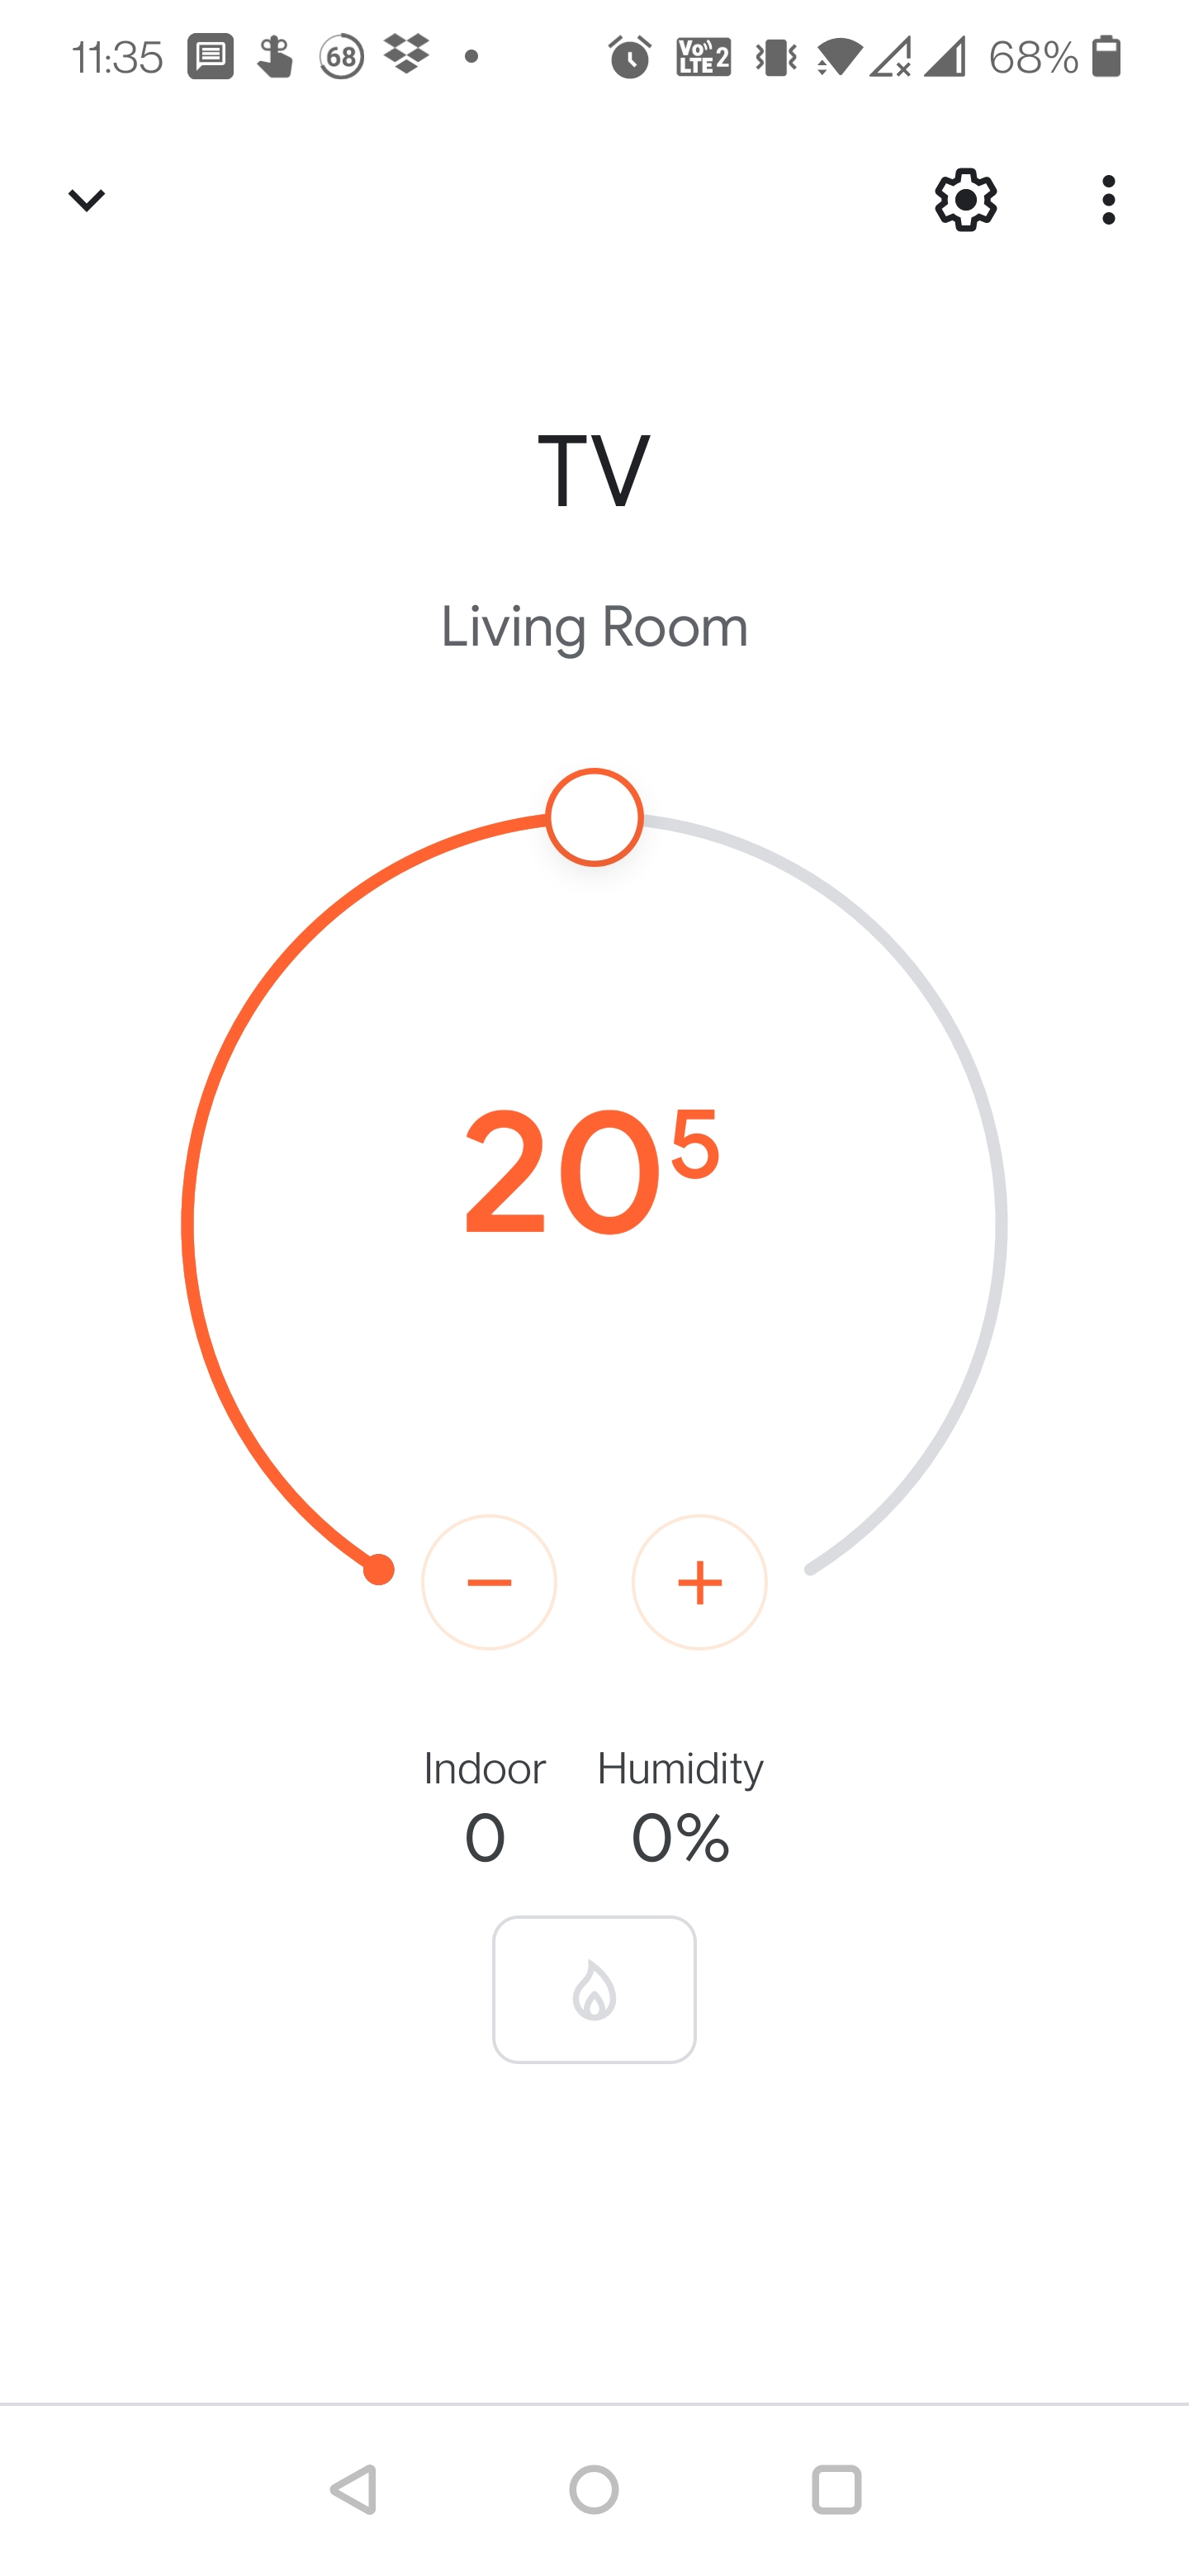
We will use a third-party software to connect the ESP8266 to Google Home. Sinric Pro is the simplest software that I could find to do this. I created an account with Sinric Pro, set up a Thermostat device (the TV device doesn’t have a slider bar for volume control, so I had to improvise), and connected the ESP8266 using the app_key, app_secret, and device_id provided by Sinric Pro. The last step is to connect my Sinric Pro account to Google Home in the Google Home App.
Voila! I am able to control my TV via Google Home.
The sketch uploaded on the ESP8266 is included below.
#include <Arduino.h>
#include <IRremoteESP8266.h>
#include <IRsend.h>

#include <ESP8266WiFi.h>
#include "SinricPro.h"
#include "SinricProThermostat.h"

#define POWER_CODE 0x61A0F00F
#define VOL_UP_CODE 0x61A030CF
#define VOL_DOWN_CODE 0x61A0B04F

#define WIFI_SSID <ssid>
#define WIFI_PASS <password>

#define APP_KEY <app_key>
#define APP_SECRET <app_secret>

#define DEVICE_ID <device_id>

#define BAUD_RATE   9600

#define IR_LED 15  // ESP8266 GPIO pin to use. Recommended: 4 (D2).

IRsend irsend(IR_LED);  // Set the GPIO to be used to sending the message.

// we use a struct to store all states and values for our dimmable switch
struct {
  bool powerState;
} device_state;

bool onPowerState(const String &deviceId, bool &state) {
  Serial.printf("Device %s power turned %s \r\n", deviceId.c_str(), state?"on":"off");

  if (state != device_state.powerState) {
    device_state.powerState = state;
    // Send power code
    irsend.sendNEC(POWER_CODE);
  }

  // Flash built-in LED.
  digitalWrite(LED_BUILTIN, LOW);
  delay(250);
  digitalWrite(LED_BUILTIN, HIGH);

  return true; // request handled properly
}

void setupWiFi()
{
  Serial.printf("\r\n[Wifi]: Connecting");
  WiFi.begin(WIFI_SSID, WIFI_PASS);

  while (WiFi.status() != WL_CONNECTED)
  {
    Serial.printf(".");
    delay(250);
  }
  IPAddress localIP = WiFi.localIP();
  Serial.printf("connected!\r\n[WiFi]: IP-Address is %d.%d.%d.%d\r\n", localIP[0], localIP[1], localIP[2], localIP[3]);
}

void setupSinricPro()
{
  SinricProThermostat &device = SinricPro[DEVICE_ID];

  // set callback function to device
  device.onPowerState(onPowerState);

  // setup SinricPro
  SinricPro.onConnected([](){ Serial.printf("Connected to SinricPro\r\n"); });
  SinricPro.onDisconnected([](){ Serial.printf("Disconnected from SinricPro\r\n"); });
  SinricPro.begin(APP_KEY, APP_SECRET);
}

void setup() {
#if ESP8266
  Serial.begin(BAUD_RATE, SERIAL_8N1, SERIAL_TX_ONLY);
#else  // ESP8266
  Serial.begin(BAUD_RATE, SERIAL_8N1);
#endif  // ESP8266

  irsend.begin();
  setupWiFi();
  setupSinricPro();
  pinMode(LED_BUILTIN, OUTPUT);
}

void loop() {
  SinricPro.handle();
}
